Regular nail trims are important for your cat's health and well-being, but many people are intimidated by the thought of trimming their cat's nails at home. If you're one of those people, don't worry; iIt's not as difficult as it seems! With the right tools and a solid understanding of the process, it's actually quite easy. With a little patience and practice, you'll be trimming your cat's nails like a pro in no time.
As veterinarians, we're here to provide the information you need to help your feline friend live a healthy, happy life. Learning how to cut your cat's nails at home is an excellent way to avoid declawing while protecting your furniture and yourself from scratches. Here's a step-by-step guide that will show you how to trim your cat's nails with minimal stress.
Why You Should Trim Your Cat's Nails:
There are several reasons why you should make nail trimming a part of your cat care routine. First and foremost, it is important for your cat's health. Overgrown nails can cause your cat pain and difficulty walking. Additionally, long nails are more prone to breaking, which can be both painful and dangerous for your cat. They are more likely to get snagged on clothing, carpets, and furniture, too. As cats age, they typically use a scratching post less and less and therefore need even more regular nail care. Be sure to check your senior cat's nails every 3-4 weeks.
Another reason to keep those nails trimmed is for your own safety! Cats with long nails are more likely to scratch, which not only hurts but can also lead to infection. No one wants that! And lastly, trimming your cat's nails can help to prevent furniture scratching - something we know all too well as pet parents.
While you may be tempted to have your cat declawed to avoid these issues, doing so is often unnecessary. Keeping their nails trimmed and providing appropriate scratching areas is usually a sufficient solution that doesn't require surgery.

Step 1: Gather Your Supplies
Before you begin, you'll need to gather a few supplies. You'll need a pair of sharp nail clippers made specifically for cats. Don't use regular nail clippers made for humans as they will crush the nail rather than cut it neatly. You'll also need styptic powder or cornstarch (in case you accidentally cut the quick), and a tasty treat for your kitty to reward them for being so patient. If you anticipate your cat not cooperating, grab a towel, too. If possible, a helper is handy and makes the job go a bit quicker.
Step 2: Prepare Your Cat
Place your cat in your lap or on a table in front of you so that they are comfortable and can't squirm away. If they're being uncooperative, try wrapping them in a towel to help them feel more secure and limit movement. Once they're settled, offer them a few treats. This will ease their stress and help them associate the experience with something positive.
Step 3: Examine Your Cat's Nails
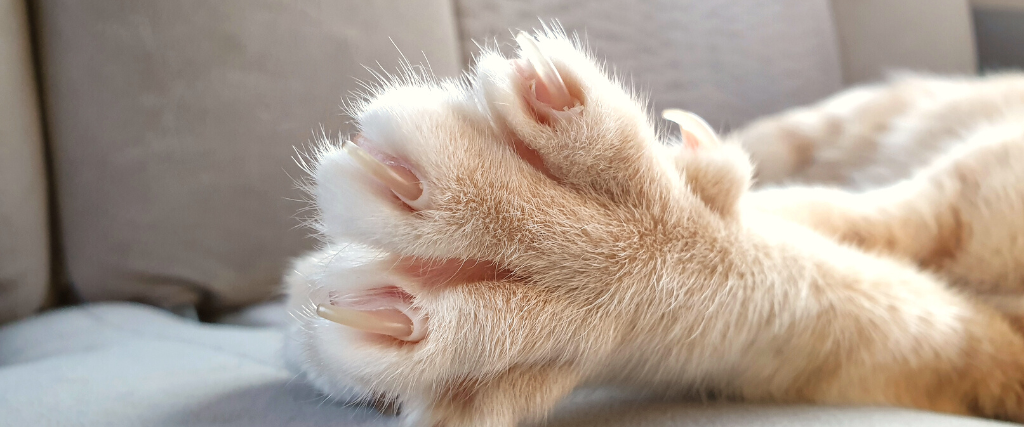
Before you start trimming, take a close look at your cat's nails and become familiar with their anatomy. Press gently on the top of the toe near the nailbed to fully extend the nail and move it away from the soft structures at the end of the digit. The part of the nail that you will be trimming is called the "tip". Beyond the tip is the "quick", which is a bundle of blood vessels and nerves. You want to avoid cutting into the quick as this will cause pain and bleeding. The good thing about cats is that, unlike dogs, their nails are clear, which makes it easy to spot the quick in most cases.
The quick gets longer as the nail grows, though, so if your cat's nails have not been trimmed in a while, it may be difficult to see where the quick begins. In this case, proceed slowly and err on the side of caution by not trimming too much off at once.

Step 4: Trim the Nails
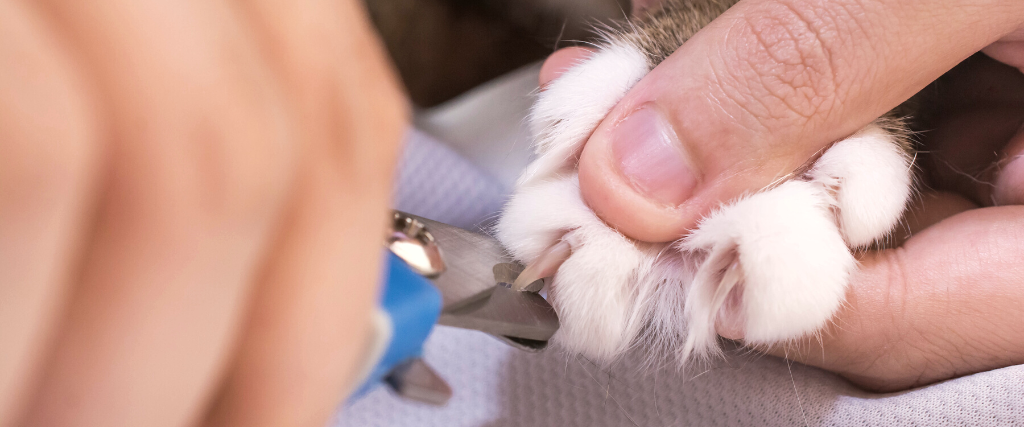
Now it's time to start trimming. Use your thumb and index finger to gently squeeze the toe pad, so that the nail pops out. Using small, quick strokes, clip off the tip of the nail. Be careful not to cut too close to the quick (the pink part of the nail). If you do hit the quick, it will bleed and be quite painful for your cat. If this happens, apply pressure to stop the bleeding and then dip the nail in styptic powder or cornstarch to help it to clot.
Repeat this process with each nail until they're all trimmed. Don't forget about the dewclaws (thumbs) on the inside of your cat's front legs. These often get neglected but still need attention. Since they are non-weight bearing, they don't get worn down like other claws. Instead, they are prone to curling over and digging into the pad. If your cat has extra digits (polydactyl) you will need to closely examine in between the extra toes as there are often extra nails present in this area too.
Pay attention to your cat's body language. If they seem overly stressed, take a break. It's better to trim one or two nails at a time over the course of a couple of days than to traumatize them trying to trim all of their claws at once.
Step 5: Reward Your Cat
Once you're finished trimming all of your cat's nails, it's time for another treat. This positive reinforcement will help them learn that getting their nails trimmed isn't so bad after all. With a little patience and practice, trimming your cat's nails at home will be a breeze.
Conclusion
Trimming your cat's nails may seem like a daunting task, but it doesn't have to be! With a little patience (and a bit of bribery), you can quickly and easily get those claws under control. Not only will regular nail trims help keep your cat healthy and pain-free, but they'll also save your furniture—and you—from scratches.
If your cat refuses to let you trim their nails or you aren't confident in your abilities, we're here to help. Contact us today if you need to schedule an appointment for feline nail trimming.

